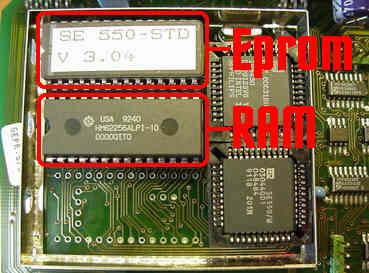
 The Eprom software will see to it that the data is correctly loaded into
the RAM. For the use of all original functions you need a codeplug
Eeprom (in the front)
. [De "kodierstecker"]
The Eprom software will see to it that the data is correctly loaded into
the RAM. For the use of all original functions you need a codeplug
Eeprom (in the front)
. [De "kodierstecker"]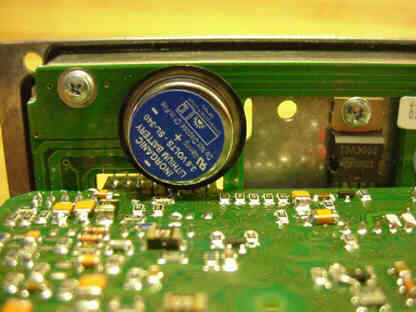 A lithium battery has to be provided in the radio to ensure that the
data stays in the RAM when the main voltage is switched off. (is this correct english??)
The mobile radio version (not the trunking version) has a
lithium battery battery already inside.
A lithium battery has to be provided in the radio to ensure that the
data stays in the RAM when the main voltage is switched off. (is this correct english??)
The mobile radio version (not the trunking version) has a
lithium battery battery already inside. | Download here | The programming software to programm the radio. |
| Download here | The total Dutch! package including the Dutch NL Eprom version. |
| Now with the full Dutch Help file, Thanks to PA0WBS | |
| Download here | The .BIN file for making a EPROM version 4.02 Eprom. |
| Download here | The .BIN file for making a EPROM version 4.02 DUTCH language. |
| Download here | Dutch Info about the settings of the 5TVO decoder(s). |
| Download here | Dutch info about how to use CTCSS with the radio. |
| Download here | A French .txt file for the IPP 550/SE940 software.  |
| Download here | A French .bin file for the IPP 550/SE940 Eprom. |


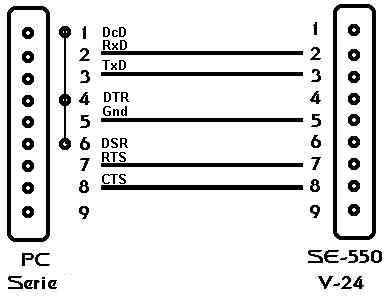
 The SE-550 radio first has to be set to the cloning-mode, If you want to programm the radio.
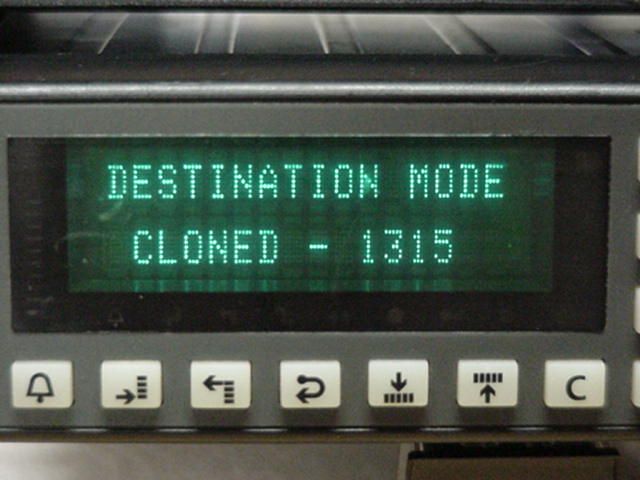 It is recommended to shut down other software during transferring data to the SE-550.
This may lead to "time out error" and loss of data and error messages after programming.
Some times there are no error messages but some channels ar not present.
It is recommended to shut down other software during transferring data to the SE-550.
This may lead to "time out error" and loss of data and error messages after programming.
Some times there are no error messages but some channels ar not present.
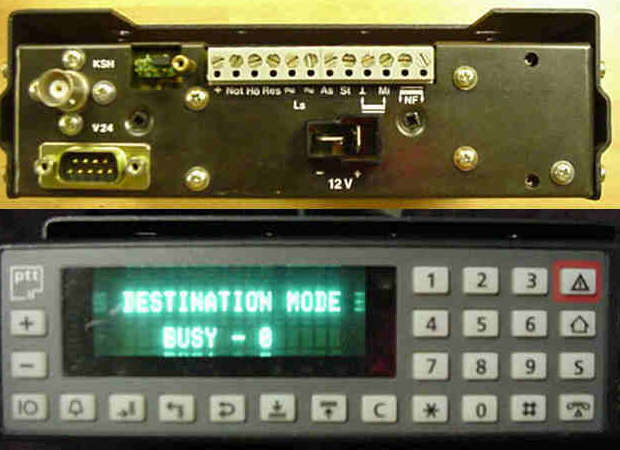
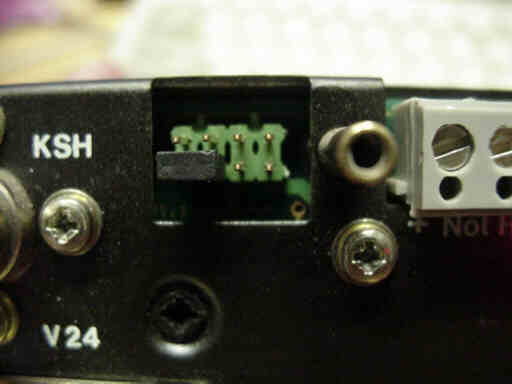 At the left you see the rear of the programming/data bracket,
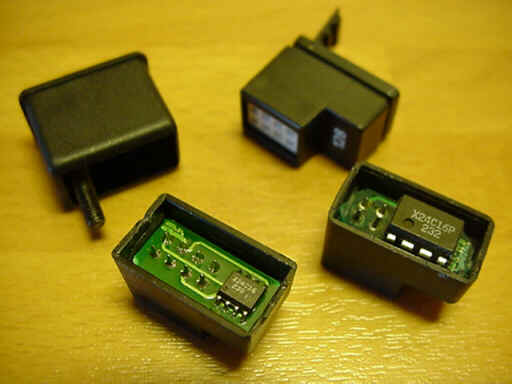 To programm the SE-550 completely you need to have a "codeplug" [kodierstecker] at the front.
Some radio's need this plug to startup and to shutdown. This "codeplug" contains a Eeprom
wich can be loaded with special information.
There are some blank connectors (at the top left in the picture) wich can be put in the
microphone socket. This is when you use the radio in a base stand.
To programm the SE-550 completely you need to have a "codeplug" [kodierstecker] at the front.
Some radio's need this plug to startup and to shutdown. This "codeplug" contains a Eeprom
wich can be loaded with special information.
There are some blank connectors (at the top left in the picture) wich can be put in the
microphone socket. This is when you use the radio in a base stand.